Docker for WindowsでNeo4Jを動かす
グラフデータベースNeo4JをDockerで動かしてみました。 SQLなどの一般的にイメージされるデータベースと異なり,グラフ構造のデータを格納することができるデータベースです。ノードとノードのつながりを表現することができるので,要求と仕様を対応させられるツールが作れそうだな~なんて夢が広がります。
環境
以下の環境を使いました。
- Windows 10 Professional version 1903
- Docker CE 19.03
Client: Docker Engine - Community
 Version:           19.03.5
 API version:       1.40
 Go version:        go1.12.12
 Git commit:        633a0ea
 Built:             Wed Nov 13 07:22:37 2019
 OS/Arch:           windows/amd64
 Experimental:      false

Server: Docker Engine - Community
 Engine:
  Version:          19.03.5
  API version:      1.40 (minimum version 1.12)
  Go version:       go1.12.12
  Git commit:       633a0ea
  Built:            Wed Nov 13 07:29:19 2019
  OS/Arch:          linux/amd64
  Experimental:     false
 containerd:
  Version:          v1.2.10
  GitCommit:        b34a5c8af56e510852c35414db4c1f4fa6172339
 runc:
  Version:          1.0.0-rc8+dev
  GitCommit:        3e425f80a8c931f88e6d94a8c831b9d5aa481657
 docker-init:
  Version:          0.18.0
  GitCommit:        fec3683
- Neo4j:4.0
インストール
コマンドプロンプトまたはPowershellで以下のコマンドを実行してNeo4JのDockerイメージを取得しておきます。
> docker image pull neo4j:4.0
コンテナの起動
以下のコマンドでコンテナを起動します。コマンドを実行するディレクトリがコンテナの/dataにマウントされます。
コマンドプロンプトの場合
> docker run -p 7474:7474 -p 7687:7687 -v "$pwd:/data" neo4j:4.0
Powershellの場合
> docker run -p 7474:7474 -p 7687:7687 -v "$(Get-Location):/data" neo4j:4.0
コンテナが起動すると以下のようなメッセージが表示されます。
Directories in use:
  home:         /var/lib/neo4j
  config:       /var/lib/neo4j/conf
  logs:         /logs
  plugins:      /var/lib/neo4j/plugins
  import:       /var/lib/neo4j/import
  data:         /var/lib/neo4j/data
  certificates: /var/lib/neo4j/certificates
  run:          /var/lib/neo4j/run
Starting Neo4j.
2020-02-13 04:39:51.067+0000 INFO  ======== Neo4j 4.0.0 ========
2020-02-13 04:39:51.077+0000 INFO  Starting...
Webインターフェースへのアクセス
http://localhost:7474へアクセスすると以下のような画面が表示されます。

以下を入力してConnectをクリックします。
- Connect URL: bold://localhost:7687
- Authentication type: Username / Password
- Username: neo4j
- Password: neo4j

ログインに成功すると以下のようなページが表示されます。

サンプルデータベースの作成
サンプルの映画データベースを作成してみます。
Webインターフェース上部のコマンド入力部分に:play movie graphを入力し,右側の▷をクリックします。

下部にある>をクリックして2ページ目に移動するとcypherスクリプトが表示されます。枠の中をクリックします。

上部のコマンド入力部分に空くrぷ都がコピーされるので,右側の▷をクリックします。

以下のようにグラフが表示されます。

データの取得
キアヌリーヴスの出演映画を取得してみましょう。
以下のコマンドをコマンド入力部に入れ,右側の▷をクリックします。
コマンド入力部ではShift + Enterで改行できます。
MATCH (actor:Person)-[r:ACTED_IN]->(movie)
WHERE actor.name = "Keanu Reeves"
RETURN actor,movie
実行すると以下のようなグラフが表示されます。
(ジョンウィックがない・・)

表示形式はグラフのほかにもレスポンスのテキスト形式などに切り替えることができます。

まとめ
Neo4JをDocker for Windowsで起動し,チュートリアルを実行できました。
グラフデータベース,何かにつかえそうですね,なにかに。
ROS2 Pub/Subサンプル
ROSやROS2ではPub/Sub方式で他のノードと通信することができます。
PublisherノードとSubscriberノードを作成して,Pub/Sub通信をしてみます。
プロジェクトの作成
ROS2開発環境のDockerコンテナを起動します。
Dockerイメージの作成方法,使用方法は以下の記事にまとめています。
コンテナを起動したら以下のコマンドを実行し,pubsubプロジェクトを作成していきます。
$ source /opt/ros/dashing/setup.bash
$ cd /home
$ mkdir src
$ cd src
$ ros2 pkg create --build-type ament_cmake pubsub --dependencies rclcpp
作成されたpubsubディレクトリ内のsrc ディレクトリに移動し,publisher.cppとsubscriber.cppを作成していきます。
ソースの記述
publisher.cppの作成
以下の内容でpublisher.cppを作成します。
#include <memory>
#include <chrono>
#include "rclcpp/rclcpp.hpp"
#include "std_msgs/msg/string.hpp"

using namespace std::chrono_literals;

class Publisher : public rclcpp::Node
{
    public:
    Publisher() : Node("publisher_node")
    {
        timer_ = create_wall_timer(1s, std::bind(&Publisher::timer_callback, this));
        publisher_ = this->create_publisher<std_msgs::msg::String>("topic", 10);

    }

    private:
    void timer_callback()
    {
        auto message = std_msgs::msg::String();
        message.data = "Hello World";
        RCLCPP_INFO(this->get_logger(), "Publishing: '%s'", message.data.c_str());
        publisher_->publish(message);
    }
    rclcpp::TimerBase::SharedPtr timer_;
    rclcpp::Publisher<std_msgs::msg::String>::SharedPtr publisher_;
};

int main(int argc, char *argv[])
{
    rclcpp::init(argc, argv);
    rclcpp::spin(std::make_shared<Publisher>());
    rclcpp::shutdown();
    return 0;
}
subscriber.cppの作成
以下の内容でsubscriber.cppを作成します。
#include <memory>
#include "rclcpp/rclcpp.hpp"
#include "std_msgs/msg/string.hpp"

using std::placeholders::_1;

class Subscriber : public rclcpp::Node
{
    public:
    Subscriber() : Node("subscriber_node")
    {
        subscriber_ = this->create_subscription<std_msgs::msg::String>("topic", 10, std::bind(&Subscriber::topic_callback, this, _1));
    }

    private:
    void topic_callback(const std_msgs::msg::String::SharedPtr msg) const
    {
        RCLCPP_INFO(this->get_logger(), "Subscribing: '%s'", msg->data.c_str());
    }
    rclcpp::Subscription<std_msgs::msg::String>::SharedPtr subscriber_;
};


int main(int argc, char *argv[])
{
    rclcpp::init(argc, argv);
    rclcpp::spin(std::make_shared<Subscriber>());
    rclcpp::shutdown();
    return 0;
}
CMakeLists.txtの編集
ros2 pkg createコマンドで自動生成されたCMakeLists.txtを編集し,以下のような内容にします。
cmake_minimum_required(VERSION 3.5)
project(pubsub)

# Default to C99
if(NOT CMAKE_C_STANDARD)
  set(CMAKE_C_STANDARD 99)
endif()

# Default to C++14
if(NOT CMAKE_CXX_STANDARD)
  set(CMAKE_CXX_STANDARD 14)
endif()

if(CMAKE_COMPILER_IS_GNUCXX OR CMAKE_CXX_COMPILER_ID MATCHES "Clang")
  add_compile_options(-Wall -Wextra -Wpedantic)
endif()

# find dependencies
find_package(ament_cmake REQUIRED)
find_package(rclcpp REQUIRED)
find_package(std_msgs REQUIRED)

add_executable(publisher src/publisher.cpp)
ament_target_dependencies(publisher rclcpp std_msgs)
install(TARGETS
publisher
DESTINATION lib/${PROJECT_NAME}
)

add_executable(subscriber src/subscriber.cpp)
ament_target_dependencies(subscriber rclcpp std_msgs)
install(TARGETS
subscriber
DESTINATION lib/${PROJECT_NAME}
)

if(BUILD_TESTING)
  find_package(ament_lint_auto REQUIRED)
  # the following line skips the linter which checks for copyrights
  # uncomment the line when a copyright and license is not present in all source files
  #set(ament_cmake_copyright_FOUND TRUE)
  # the following line skips cpplint (only works in a git repo)
  # uncomment the line when this package is not in a git repo
  #set(ament_cmake_cpplint_FOUND TRUE)
  ament_lint_auto_find_test_dependencies()
endif()

ament_package()
ビルド
上記の3ファイルを編集したら以下のコマンドを実行してビルドします。
$ cd /home
$ colcon build
動作確認
Publisherの起動
ROS2開発環境のDockerコンテナ内で以下のコマンドを実行し,Publisherを起動します。
$ cd /home/src
$ source install/setup.bash
$ ros2 run pubsub publisher
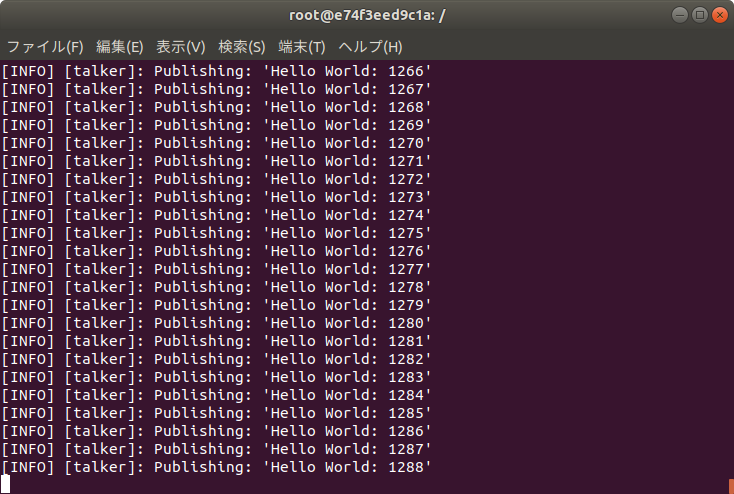
以下のように1秒毎に文字列がPublishされます。

Subscriberの起動
ROS2開発環境のDockerコンテナをもう一つ起動し,以下のコマンドを実行してSubscriberを起動します。
$ source /opt/ros/dashing/setup.bash
$ cd /home/src
$ source install/setup.bash
$ ros2 run pubsub publisher
以下のようにSubscribeした文字列を表示します。
publisher.cppとsubscriber.cppで同じトピックを指定しているので上記で起動したPublisherが出力した文字がSubscriberに表示されます。

Docker環境でROS2プログラム開発
前回作成したROS2開発環境のDockerイメージを使ってROS2プログラムを作っていきます。
以下のような流れです。
- パッケージの作成
- ソースの記述
- CMakeLists.txtの編集
- package.xmlの編集
- ビルド
- 動作確認
コンテナの起動
以下のようにして/etc/groupと/etc/passwdをマウントし,Dockerコンテナのシェルを一般ユーザーで起動するようにするとソースの記述やCMakeLists.txtを編集するときにsudoを使う手間がなくなります。
以降の手順ではros2 pkg createによってディレクトリやファイルが自動生成されるので,空のディレクトリ内で以下を実行します。
$ docker run --rm -it -v `pwd`:/home -v /etc/group:/etc/group:ro -v /etc/passwd:/etc/passwd:ro -u $(id -u $USER):$(id -g $USER) ros2:dashing
コンテナ起動後に以下を実行します。
$ source /opt/ros2/dashing/setup.bash
パッケージの作成
パッケージはsrcディレクトリ内に作成する必要があります。まずはsrcディレクトリを作成し,その中でros2 pkg createコマンドを実行します。
ビルド時にはここで作成したsrcディレクトリの一つ上(ここでは/home)でcolcon buildコマンドを実行する必要があります。
$ cd /home
$ mkdir src
$ cd src
$ ros2 pkg create --build-type ament_cmake sample --dependencies rclcpp
sample/src内にsample.cppを作成
上のようなros2 pkg createコマンドを実行するとsampleディレクトリが作成され,その中にsrcディレクトリが作成されます。
以下のようなsample.cppをsrcディレクトリ内に作成します。
#include <memory>
#include <chrono>
#include "rclcpp/rclcpp.hpp"

using namespace std::chrono_literals;

class SampleClass : public rclcpp::Node
{
    public:
    SampleClass() : Node("sample_node")
    {
        timer_ = create_wall_timer(1s, std::bind(&SampleClass::timer_callback, this));
    }
    private:
    void timer_callback()
    {
        RCLCPP_INFO(this->get_logger(), "Hello World");
    }
    rclcpp::TimerBase::SharedPtr timer_;
};

int main(int argc, char *argv[])
{
    rclcpp::init(argc, argv);
    rclcpp::spin(std::make_shared<SampleClass>());
    rclcpp::shutdown();
    return 0;
}
CMakeLists.txtの編集
CMakeLists.txtを以下のように編集します。
Dockerコンテナを立ち上げたディレクトリ内にあるファイルを適当なエディタで編集すればDockerコンテナ内にも反映されます(当たり前ですが)
cmake_minimum_required(VERSION 3.5)
project(sample)

# Default to C99
if(NOT CMAKE_C_STANDARD)
  set(CMAKE_C_STANDARD 99)
endif()

# Default to C++14
if(NOT CMAKE_CXX_STANDARD)
  set(CMAKE_CXX_STANDARD 14)
endif()

if(CMAKE_COMPILER_IS_GNUCXX OR CMAKE_CXX_COMPILER_ID MATCHES "Clang")
  add_compile_options(-Wall -Wextra -Wpedantic)
endif()

# find dependencies
find_package(ament_cmake REQUIRED)
find_package(rclcpp REQUIRED)

add_executable(sample_package src/sample.cpp)
ament_target_dependencies(sample_package rclcpp)
install(TARGETS
sample_package
DESTINATION lib/${PROJECT_NAME}
)

if(BUILD_TESTING)
  find_package(ament_lint_auto REQUIRED)
  # the following line skips the linter which checks for copyrights
  # uncomment the line when a copyright and license is not present in all source files
  #set(ament_cmake_copyright_FOUND TRUE)
  # the following line skips cpplint (only works in a git repo)
  # uncomment the line when this package is not in a git repo
  #set(ament_cmake_cpplint_FOUND TRUE)
  ament_lint_auto_find_test_dependencies()
endif()

ament_package()
package.xmlの編集
package.xmlを以下のように編集します。
<?xml version="1.0"?>
<?xml-model href="http://download.ros.org/schema/package_format3.xsd" schematypens="http://www.w3.org/2001/XMLSchema"?>
<package format="3">
  <name>sample</name>
  <version>0.0.0</version>
  <description>TODO: Package description</description>
  <maintainer email="root@todo.todo">root</maintainer>
  <license>TODO: License declaration</license>

  <buildtool_depend>ament_cmake</buildtool_depend>

  <test_depend>ament_lint_auto</test_depend>
  <test_depend>ament_lint_common</test_depend>

  <build_depend>rclcpp</build_depend>
  <exec_depend>rclcpp</exec_depend>

  <export>
    <build_type>ament_cmake</build_type>
  </export>
</package>
ビルド
ros2 pkg createコマンドを実行したディレクトリの一つ上(ここでは/home)に移動し,colcon buildを実行します。
$ cd /home
$ colcon build
動作確認
ビルドに成功したら以下のコマンドを実行し,動作確認を行います。
$ source install/setup.bash
$ ros2 run sample sample_package
ここでsampleはros2 pkg createコマンド実行時に与えたパッケージ名,sample_packageはCMakeLists.txtで指定したexecutable名です。
これらを変えれば好きな名前にできます。
上記のコマンドを実行すると以下のように1秒毎に文字列が表示されます。
[INFO] [sample_node]: Hello World
[INFO] [sample_node]: Hello World
[INFO] [sample_node]: Hello World
[INFO] [sample_node]: Hello World
開発環境コンテナでROS2プログラムを作成することができました。
VSCodeの拡張機能か何かを使ってラクしたいですね〜
ROS2開発環境をDockerで構築する
ROS2の勉強始めよっかな〜と思い立ったので ROS2ではじめよう 次世代ロボットプログラミングの第2章を参考にROS2環境をDockerで構築してみました。
セットアップ方法を見ていると「ROS1環境があるところにROS2をセットアップすると環境変数とか依存関係で大変なことになる場合があります」というようなことが書いてあり,そのままインストールするとあとで大変になりそうなのでDockerイメージとして構築してみます。
Dockerfileの作成とイメージのビルド
以下のようなDockerfileを作成します。
# docker build -t ros2:dashing .
FROM ubuntu:18.04
ENV DEBIAN_FRONTEND noninteractive

ENV ROS_DISTRO dashing

# ロケールのセットアップ
RUN apt-get update && apt-get install -y locales && \
    dpkg-reconfigure locales && \
    locale-gen ja_JP ja_JP.UTF-8 && \
    update-locale LC_ALL=ja_JP.UTF-8 LANG=ja_JP.UTF-8
ENV LC_ALL   ja_JP.UTF-8
ENV LANG     ja_JP.UTF-8
ENV LANGUAGE ja_JP.UTF-8

# APTソースリストの設定
RUN apt-get update && \
    apt-get install -y curl gnupg2 lsb-release && \
    curl http://repo.ros2.org/repos.key | apt-key add - && \
    sh -c 'echo "deb [arch=amd64,arm64] http://packages.ros.org/ros2/ubuntu \
    `lsb_release -cs` main" > /etc/apt/sources.list.d/ros2-latest.list' && \
    apt-get update

# ROS2パッケージのインストール
RUN export ROS_DISTRO=dashing && \
    apt-get install -y ros-$ROS_DISTRO-desktop \
    python3-colcon-common-extensions python3-rosdep python3-argcomplete && \
    rosdep init && \
    rosdep update

## 環境設定
RUN    echo "source /opt/ros/$ROS_DISTRO/setup.bash" >> ~/.bashrc
Dockerfileを保存したディレクトリの中で以下を実行します。
$ docker build --rm -t ros2:dashing .
30分以上かかるので気長に待ちます。
動作確認
demo_nodes_cppに含まれるTalkerとListenerを使って動作確認してみます。
うまく行けばTalkerで出力された内容がListenerで受信されることを確認できます。
ターミナルを2つ開き,それぞれで以下のコマンドを実行してコンテナを起動します。
$ docker run --rm -it ros2:dashing
Listenerの起動
一方のターミナルで以下のコマンドを実行し,Listenerを起動します。
# ros2 run demo_nodes_cpp listener
Talkerの起動
もう一方のターミナルで以下のコマンドを実行し,Talkerを起動します。
# ros2 run demo_nodes_cpp talker
表示例
Talkerの表示例
Listenerの表示例

以上のようにTalkerの内容がListenerに反映されれば正常に動作しています。
あとは以下のような感じでROS2ノードを作って遊びましょう。
RealTime処理のサンプルプログラム
前回の記事ではDockerコンテナ上でcyclictestを実行しました。
今回は
HOWTO build a simple RT applicationを参考にリアルタイムアプリケーションを作成してみます。
Exampleに載っている内容をsample.cとして保存し,以下のコマンドでコンパイルします。
$ gcc -pthread sample.c
Dockerコンテナを起動して実行してみます。生成されたa.outがあるディレクトリ内で以下を実行します。
$ docker run --rm -it --cpu-rt-runtime=950000 --ulimit rtprio=99 --cap-add=sys_nice -v `pwd`:/home ubuntu
コンテナが起動したら/homeに移動し,./a.outを実行します。
エラーがあった場合にはエラー箇所が表示されますが,正常に動作した場合は何も表示されません。あまり面白くないですね...
周期実行サンプル
HOWTO build a basic cyclic applicationを参考に以下のようなファイルをsample_cyclic.cとして作成します。
/* * POSIX Real Time Example * using a single pthread as RT thread */ #include <limits.h> #include <pthread.h> #include <sched.h> #include <stdio.h> #include <stdlib.h> #include <sys/mman.h> #include <time.h> struct period_info { struct timespec next_period; long period_ns; }; static void inc_period(struct period_info *pinfo) { pinfo->next_period.tv_nsec += pinfo->period_ns; while (pinfo->next_period.tv_nsec >= 1000000000) { /* timespec nsec overflow */ pinfo->next_period.tv_sec++; pinfo->next_period.tv_nsec -= 1000000000; } } static void periodic_task_init(struct period_info *pinfo) { /* for simplicity, hardcoding a 1ms period */ pinfo->period_ns = 1000000; clock_gettime(CLOCK_MONOTONIC, &(pinfo->next_period)); } static void do_rt_task() { struct timespec ts; clock_gettime(CLOCK_REALTIME, &ts); printf("time: %10ld.%09ld\n", ts.tv_sec, ts.tv_nsec); /* Do RT stuff here. */ } static void wait_rest_of_period(struct period_info *pinfo) { inc_period(pinfo); /* for simplicity, ignoring possibilities of signal wakes */ clock_nanosleep(CLOCK_MONOTONIC, TIMER_ABSTIME, &pinfo->next_period, NULL); } void *thread_func(void *data) { /* Do RT specific stuff here */ struct period_info pinfo; periodic_task_init(&pinfo); while (1) { do_rt_task(); wait_rest_of_period(&pinfo); } return NULL; } int main(int argc, char* argv[]) { struct sched_param param; pthread_attr_t attr; pthread_t thread; int ret; /* Lock memory */ if(mlockall(MCL_CURRENT|MCL_FUTURE) == -1) { printf("mlockall failed: %m\n"); exit(-2); } /* Initialize pthread attributes (default values) */ ret = pthread_attr_init(&attr); if (ret) { printf("init pthread attributes failed\n"); goto out; } /* Set a specific stack size */ ret = pthread_attr_setstacksize(&attr, PTHREAD_STACK_MIN); if (ret) { printf("pthread setstacksize failed\n"); goto out; } /* Set scheduler policy and priority of pthread */ ret = pthread_attr_setschedpolicy(&attr, SCHED_FIFO); if (ret) { printf("pthread setschedpolicy failed\n"); goto out; } param.sched_priority = 80; ret = pthread_attr_setschedparam(&attr, ¶m); if (ret) { printf("pthread setschedparam failed\n"); goto out; } /* Use scheduling parameters of attr */ ret = pthread_attr_setinheritsched(&attr, PTHREAD_EXPLICIT_SCHED); if (ret) { printf("pthread setinheritsched failed\n"); goto out; } /* Create a pthread with specified attributes */ ret = pthread_create(&thread, &attr, thread_func, NULL); if (ret) { printf("create pthread failed\n"); goto out; } /* Join the thread and wait until it is done */ ret = pthread_join(thread, NULL); if (ret) printf("join pthread failed: %m\n"); out: return ret; }
最初のsample.cと同様に以下のようにしてコンパイルします。
$ gcc -pthread -o cyclic sample_cyclic.c
Dockerコンテナ上で./cyclicを実行すると以下のように1msごとに時刻が表示されます。
time: 1580301619.999005823
time: 1580301620.000007537
time: 1580301620.001007728
time: 1580301620.002007485
time: 1580301620.003007308
time: 1580301620.004011275
time: 1580301620.005009829
time: 1580301620.006012556
time: 1580301620.007010412
time: 1580301620.008012001
time: 1580301620.009012342
リアルタイム処理の記述
以上でとりあえずサンプルは動きました。
自分の好きなことを好きな間隔で実行させるには以下の箇所を修正します。
static void periodic_task_init(struct period_info *pinfo)
{
        /* for simplicity, hardcoding a 1ms period */
        pinfo->period_ns = 1000000;

        clock_gettime(CLOCK_MONOTONIC, &(pinfo->next_period));
}

static void do_rt_task()
{
        struct timespec ts;
        clock_gettime(CLOCK_REALTIME, &ts);
        printf("time: %10ld.%09ld\n", ts.tv_sec, ts.tv_nsec);

        /* Do RT stuff here. */
}
periodic_task_init内のpinfo->period_nsを変更すれば実行周期を変えられます。
do_rt_task()の中には周期ごとに実行したい処理を記述しましょう。
以上で最低限のリアルタイムは実行できるようになります。
Dockerコンテナでのcyclictest実行結果
前回はDockerコンテナでcyclictestを動作させるところまでやってみました。
今回はcyclictestの結果をもう少し詳しく見てみます。
環境
以下の環境で試しました。
docker version
Client:
 Version:           18.09.7
 API version:       1.39
 Go version:        go1.10.1
 Git commit:        2d0083d
 Built:             Fri Aug 16 14:20:06 2019
 OS/Arch:           linux/amd64
 Experimental:      false

Server:
 Engine:
  Version:          18.09.9
  API version:      1.39 (minimum version 1.12)
  Go version:       go1.13.4
  Git commit:       9552f2b
  Built:            Sat Nov 16 01:07:48 2019
  OS/Arch:          linux/amd64
  Experimental:     false
cyclictestについて
cyclictestは以下の図のように一定時間ごとにリアルタイムスレッドを起動して,理想とするスレッドの起動時刻と実際にスレッドが起動した時刻との差(レイテンシ)を計測するテストです。

当然レイテンシは低ければ低いほどよいと言えます。
CPU負荷の与え方
CPU負荷が高い場合にもリアルタイムスレッドが定周期実行されることを確認したいので,以下のようなスクリプトを実行しながらcyclictestを実行します。
実行するとCPU使用率がほぼ100%になります。
while true; do dd if=/dev/zero of=bigfile bs=1024000 count=1024; done &
 while true; do killall hackbench; sleep 5; done &
 while true; do ./hackbench 20; done &
 ( cd ltp-full-20040707; su mingo -c ./run40; ) &
 ping -l 100000 -q -s 10 -f v &
 du / &
 ./dortc &
cyclictestの実行
前回の記事と同じ手順でrttestコンテナを起動し,以下のコマンドを実行します。
100ms周期で1時間テストを実行し,レイテンシ3000[us]までのヒストグラムを表示します。
# cyclictest --smp --priority=99 --interval=100000 --distance=0 -l36000 -h3000
結果
以下のような結果が得られました。
T: 0 (   31) P:99 I:100000 C:  36000 Min:      5 Act:   11 Avg:   10 Max:    3417
T: 1 (   32) P:99 I:100000 C:  36000 Min:      7 Act:   21 Avg:   14 Max:    4488
T: 2 (   33) P:99 I:100000 C:  36000 Min:      5 Act:   14 Avg:   14 Max:    4390
T: 3 (   34) P:99 I:100000 C:  36000 Min:      5 Act:   11 Avg:   10 Max:    4498
# Histogram
000000 000000   000000  000000  000000
000001 000000   000000  000000  000000
000002 000000   000000  000000  000000
000003 000000   000000  000000  000000
000004 000000   000000  000000  000000
000005 000001   000000  000007  000017
000006 000058   000000  000498  000537
000007 001017   000003  004293  005340
000008 006554   000034  008831  009400
000009 009585   000258  007380  008309
000010 007967   001102  005890  005945
000011 005389   003659  003540  003257
000012 002894   007126  001574  001387
000013 001071   006705  000727  000624
000014 000442   005549  000406  000293
000015 000200   004313  000270  000208
000016 000136   003121  000205  000124
000017 000098   001697  000159  000081
000018 000053   000799  000113  000058
000019 000038   000385  000096  000033
000020 000035   000205  000076  000029
000021 000027   000176  000086  000017
000022 000018   000111  000073  000026
000023 000009   000087  000087  000011
000024 000021   000064  000102  000010
000025 000039   000058  000065  000022
...
002996 000000   000000  000000  000000
002997 000000   000000  000000  000000
002998 000000   000000  000000  000000
002999 000000   000000  000000  000000
# Total: 000035997 000035996 000035993 000035998
# Min Latencies: 00005 00007 00005 00005
# Avg Latencies: 00010 00014 00014 00010
# Max Latencies: 03417 04488 04390 04498
# Histogram Overflows: 00003 00004 00007 00002
# Histogram Overflow at cycle number:
# Thread 0: 19250 24091 34394
# Thread 1: 24091 30057 34394 34806
# Thread 2: 16096 17984 24091 28377 30057 32070 34394
# Thread 3: 19250 28377
最大レイテンシは4498[us]ですが,平均は約10[us]です。
これくらいの精度で十分な用途であればコンテナでのリアルタイムアプリケーションも使えるのではないでしょうか。
ヒストグラムを25[us]までグラフ化すると以下のようになります。

結構10us付近にまとまっています。CPU1はどうしたのか・・・
Dockerでリアルタイム処理(cyclictest)を実行する
Dockerコンテナでリアルタイムタスクは動かせないの?と思ったので試してみました。
docker docs | Runtime options with Memory, CPUs, and GPUsにはConfigure the realtime schedulerという項目があり,リアルタイム処理を実現できそうな感じがします。
以下の手順でDockerコンテナ上でcyclictestを実行するところまでやってみます。
- カーネルのビルド
- リアルタイムスケジューラを使ったコンテナの起動
- cyclictestの実行
CONFIG_RT_GROUP_SCHEDを有効にしたカーネルをビルドする
docker docsを見るとCONFIG_RT_GROUP_SCHEDが有効になっているカーネルでないとコンテナがリアルタイムスケジューラを使用できないようです。RT PREEMPTIONパッチを当てがてら,CONFIG_RT_GROUP_SCHEDを有効にしてカーネルをビルドします。
パッチとカーネルソースのダウンロード
実はPreemption ModelをLowlatency DesktopとしないとCONFIG_RT_GROUP_SCHEDを有効にできないので,RT PREEMTTIONパッチは必要はなさそうですが一応当てておきます。
まずは以下からRT PREEMPTIONパッチを探します。
https://mirrors.edge.kernel.org/pub/linux/kernel/projects/rt/5.4/
5.4.13-rt7が最新版のようなので,以下から5.4.13のソースをダウンロードします。
https://mirrors.edge.kernel.org/pub/linux/kernel/v5.x/
以下の.tar.gzファイルをダウンロードしました。 https://mirrors.edge.kernel.org/pub/linux/kernel/v5.x/linux-5.4.13.tar.gz
RT PREEMPTIONパッチの適用
カーネルソースとパッチを同じディレクトリに保存し,以下を実行します。
$ tar xf linux-5.4.13.tar.gz
$ cd linux-5.4.13
$ gzip -cd ../patch-5.4.13-rt7.patch.gz | patch -p1 --verbose
Preemption Modelの変更
$ make menuconfig
以下のように
General setup > Preemption Model > Preemptible Kernel(Low-Latency Desktop)を選択します。

以下のようにGeneral setup > Control Group support > CPUControllerのGroup scheduling for SCHED_RR/FIFOにチェックを入れます。
上記のPreemption ModelでFully Preemptible Kernel(Real-Time)を選択するとGroup scheduling for SCHED_RR/FIFOが選択できなくなります。

上記2つを設定したら下部メニューのExitを選択し,menuconfigを終了します。終了時に.configに内容を保存するか聞かれるのでYesを選択します。
カーネルイメージの作成
以下のコマンドを実行し,カーネルイメージとヘッダイメージを作成します。
$ make-kpkg -j 8 --rootcmd fakeroot --initrd kernel_image kernel_headers
ソースが展開されているディレクトリの一つ上の階層に.debファイルが作成されるので以下のコマンドを実行して.debファイルをインストールします。
$ cd ..
$ sudo dpkg -i linux-headers-5.4.13-rt7_5.4.13-rt7-10.00.Custom_amd64.deb linux-image-5.4.13-rt7_5.4.13-rt7-10.00.Custom_amd64.deb
GRUBメニューが表示されなくなることの対策
ビルドしたカーネルをインストールして再起動しGRUBメニューでカーネルを選択するわけですが,起動時にGRUBメニューが表示されない場合があります。
そのような場合は,/etc/default/grubファイルを編集してGRUBメニューが表示されるようにします。
$ sudo vi /etc/default/grub

以下のように先頭に#をつけて,2行をコメントアウトする
# GRUB_TIMEOUT_STYLE=hidden
# GRUB_TIMEOUT=0
編集後はupdate-grubを実行しておきます。
Invalid Signatureによりカーネルがロードできない場合の対策
ビルドしたカーネルで起動しようとした際にInvalid Signatureエラーによりカーネルがロードできない場合があります。
以下のようにしてSecure Bootを無効にすることで回避できます。
PCをシャットダウンする前に以下のコマンドを実行します。
$ sudo mokutil --disable-validation
再起動後にmokutilを実行するか確認するダイアログが表示されます。mokutilを実行すると上記のmokutilコマンド実行時に設定したパスワード入力を求められます。
入力したパスワードをすべて入力するのではなく,パスワードの何文字目は何かという形式で1文字ずつ入力します。
リアルタイムスケジューラを使うコンテナの起動
起動前の確認
以下のファイルがあることを確認します。
/sys/fs/cgroup/cpu.rt_runtime_us
Dockerデーモンが動作していることを確認します。
$ docker ps
起動していない場合,以下コマンドにより再起動します。
$ sudo service docker restart
Dockerfileの作成とイメージのビルド
以下のようなDockerfileを作成します。ubuntu18.04にRT-Testsをインストールしています。
FROM ubuntu:18.04

RUN apt-get update && apt-get upgrade -y && apt-get install -y build-essential libnuma-dev git python
RUN git clone git://git.kernel.org/pub/scm/utils/rt-tests/rt-tests.git && \
    cd rt-tests && \
    git checkout stable/v1.0 && \
    make all && \
    make install
Dockerファイルをビルドします。
$ docker build -t rttest:latest .
コンテナの起動
以下のコマンドによりrttestイメージを起動します。
$ docker run -it --cpu-rt-runtime=950000 --ulimit rtprio=99 --cap-add=sys_nice rttest:latest
起動時に以下のようなエラーが出る場合があります。
docker: Error response from daemon: OCI runtime create failed: container_linux.go:345: starting container process caused "process_linux.go:281: applying cgroup configuration for process caused \"failed to write 950000 to cpu.rt_runtime_us: write /sys/fs/cgroup/cpu,cpuacct/docker/e2a68990c554b501acfdee02a2d6be94240edd8860335c6ce5b64f559e82eba3/cpu.rt_runtime_us: invalid argument\"": unknown.
上記のようなエラーが出るのは/sys/fs/cgroup/cpu/docker/cpu.rt_runtime_usに設定されているリアルタイムタスクの実行時間が0になっているためのようなので,以下のコマンドにより0以上の値を設定します。
$ sudo -s
# echo 950000 > /sys/fs/cgroup/cpu/docker/cpu.rt_runtime_us
/sys/fs/cgroup/cpu/docker/cpu.rt_period_usには1000000が設定されており,これとの比率で割り当てられたCPU処理時間の何%をリアルタイム処理に回すかを設定できます。上記の場合はcpu.rt_runtime_usが950000なので,95%がリアルタイム処理に回されます。
上記を実行後,再度docker runコマンドを実行し,rttestコンテナのコンソールに接続します。
cyclictestの実行
起動したコンテナ上でcyclictestを実行します。
# cyclictest --smp --priority=80 --interval=200 --distance=0
以下のように表示され,cyclictestが実行できました。
WARN: stat /dev/cpu_dma_latency failed: No such file or directory
policy: fifo: loadavg: 6.18 3.00 1.65 6/1057 23

T: 0 (   20) P:80 I:200 C: 618500 Min:      2 Act:    7 Avg:    8 Max:    2419
T: 1 (   21) P:80 I:200 C: 617407 Min:      2 Act:    6 Avg:    8 Max:    2513
T: 2 (   22) P:80 I:200 C: 618459 Min:      2 Act:   12 Avg:    7 Max:    2540
T: 3 (   23) P:80 I:200 C: 616966 Min:      2 Act:    6 Avg:    9 Max:    2431
しかし,スレッドの起動周期200us(cyclictestの引数--inteval=200)に対して最大のレイテンシが2540usとなっています。
平均は約10usなので概ね大丈夫そうですが,たまに遅れるようです。
まとめ
Dockerコンテナ上でcyclictestを実行するところまで試しました。
次回はcyclictestの結果をヒストグラム表示してもう少し詳しく見てみます。