Raspberry Pi MouseをUbuntu 20.04 + ROS2 foxyで動かす
年度末になると掃除したり引き継いだりで面白いモノが出てきたりします。今年はその辺の棚からRaspberry Pi Mouseが出てきたのでUbuntu 20.04とROS2 foxyで動かしてみました。
手順
以下のような手順です。
- Raspberry PiにUbuntu 20.04 LTSをインストール
- ROS2 foxyのインストール
- Raspberry Pi Mouseデバイスドライバのインストール
- テスト用ROS2ノードの作成
- テスト走行
環境
- Raspberry Pi Mouseバージョン不明,リンク先はV3
- Raspberry Pi 3 Model B V1.2
- Ubuntu 20.04 LTS (Raspberry Pi Mouse,セットアップ用PC両方)
Raspberry PiにUbuntu 20.04 LTSをインストールする
Ubuntu 20.04 LTS イメージのダウンロードとMicro SDへの書き込み
Install Ubuntu on a Raspberry PiからARM 64bit用イメージをダウンロードし, 以下のコマンドで解凍します。
$ xz -dv ubuntu-20.04.2-preinstalled-server-arm64+raspi.img.xz
解凍したイメージを以下のコマンドでMicroSDカードに書き込みます。(MicroSDカードが/dev/mmcblk0として認識されている場合)
$ sudo dd if=ubuntu-20.04.2-preinstalled-server-arm64+raspi.img of=/dev/mmcblk0 bs=4M oflag=direct status=progress
無線LAN設定
イメージを書き込んだらMicroSDカードをマウントし,初回起動時から無線LANに接続できるように設定しておきます。
system-boot/network.configを以下のように編集します。
# This file contains a netplan-compatible configuration which cloud-init
# will apply on first-boot. Please refer to the cloud-init documentation and
# the netplan reference for full details:
#
# https://cloudinit.readthedocs.io/
# https://netplan.io/reference
#
# Some additional examples are commented out below

version: 2
ethernets:
  eth0:
    dhcp4: true
    optional: true
wifis:
  wlan0:
    dhcp4: true
    optional: true
    access-points:
      myhomewifi:
        password: "S3kr1t"
#      myworkwifi:
#        password: "correct battery horse staple"
#      workssid:
#        auth:
#          key-management: eap
#          method: peap
#          identity: "me@example.com"
#          password: "passw0rd"
#          ca-certificate: /etc/my_ca.pem
起動
上記の設定が終わったらMicro SDカードをRaspberry Piに挿入して起動します。IPアドレスはDHCPで取得するように設定したのでRaspberry PiのIPアドレスを以下のコマンドにより調査します。
例では192.168.0.30に設定されています。
$ nmap -sP 192.168.0.0/24
Starting Nmap 7.80 ( https://nmap.org ) at 2021-03-05 21:04 JST
Nmap scan report for _gateway (192.168.0.1)
...
Nmap scan report for 192.168.0.30
...
Nmap done: 256 IP addresses (4 hosts up) scanned in 3.71 seconds
Raspberry PiのIPアドレスを調査したらsshで接続します。
$ ssh ubuntu@192.168.0.30
ROS2 foxyのインストール
Installing ROS 2 via Debian Packagesの手順に従って,以下のコマンドを実行してROS2 foxyをインストールします。
$ sudo apt update && sudo apt install curl gnupg2 lsb-release
$ curl -s https://raw.githubusercontent.com/ros/rosdistro/master/ros.asc | sudo apt-key add -
$ sudo sh -c 'echo "deb [arch=$(dpkg --print-architecture)] http://packages.ros.org/ros2/ubuntu $(lsb_release -cs) main" > /etc/apt/sources.list.d/ros2-latest.list'
$ sudo apt update
$ sudo apt install ros-foxy-ros-base
$ sudo apt install python3-colcon-common-extensions
$ sudo apt install -y python3-pip
$ pip3 install -U argcomplete
Raspberry Pi Mouseデバイスドライバのインストール
rt-net/RaspberryPiMouse のインストール手順にしたがってデバイスドライバをインストールします。
$ git clone https://github.com/rt-net/RaspberryPiMouse.git
$ cd RaspberryPiMouse/utils
$ sudo apt install linux-headers-$(uname -r) build-essential
$ ./build_install.bash
/dev/rtlightsensor0の値を表示して動作確認します。
ubuntu@ubuntu:~/raspimouse/RaspberryPiMouse/utils$ cat /dev/rtlightsensor0
24 1 2 35
車体右側のセンサ直前にものを置いたとき
ubuntu@ubuntu:~/raspimouse/RaspberryPiMouse/utils$ cat /dev/rtlightsensor0
26 2 3 461
値が変化していることがわかります。正常に動作しているようです。
再起動した際には以下コマンドによりドライバを読み込ませる必要があります。
$ cd ~/raspimouse/RaspberryPiMouse/src/drivers
$ sudo insmod rtmouse.ko
$ sudo chmod 666 /dev/rt*
$ echo 0 > /dev/rtmotoren0
起動時にrtmouse.koを読み込む
上記のコマンドを毎回実行するのは面倒なので起動時に自動実行されるようにします。
/usr/local/binに以下の内容のload-rtmouse.shを作成します。
#!/bin/bash

insmod /home/ubuntu/raspimouse/RaspberryPiMouse/src/drivers/rtmouse.ko
chmod 666 /dev/rt*
echo 0 > /dev/rtmotoren0
load-rtmouse.shのパーミッションを変更しておきます。
$ sudo chmod 744 /usr/local/bin/load-rtmouse.sh
また,/etc/systemd/systemにload-rtmouse.serviceを作成します。
[Unit]
After=network.target

[Service]
ExecStart=/usr/local/bin/load-rtmouse.sh

[Install]
WantedBy=default.target
こちらもパーミッションを変更しておきます。
$ sudo chmod 664 /etc/systemd/system/load-rtmouse.service
load-rtmouse.shとload-rtmouse.serviceを作成したら以下のコマンドを実行します。
$ sudo systemctl daemon-reload
$ sudo systemctl enable load-rtmouse.service
テスト用ROS2ノードの作成
ros2 / examplesのpublisher_member_function.pyを改造し,以下のようなノードを作成します。
import rclpy
from rclpy.node import Node

from std_msgs.msg import String
from geometry_msgs.msg import Twist

import math

class MinimalPublisher(Node):

    def __init__(self):
        super().__init__('minimal_publisher')
        self.publisher_ = self.create_publisher(String, 'topic', 10)
        timer_period = 0.5  # seconds
        self.timer = self.create_timer(timer_period, self.timer_callback)
        self.i = 0

        self.subscriber_ = self.create_subscription(Twist, 'cmd_vel', self.velocity_command, 10)
        self.left_motor_control_ = open('/dev/rtmotor_raw_l0', 'w')
        self.right_motor_control_ = open('/dev/rtmotor_raw_r0', 'w')

    def timer_callback(self):
        msg = String()
        msg.data = 'Hello World: %d' % self.i
        self.publisher_.publish(msg)
        self.get_logger().info('Publishing: "%s"' % msg.data)
        self.i += 1

    def velocity_command(self, msg):
        linear_velocity_ = msg.linear.x
        angular_velocity_ = msg.angular.z

        self.get_logger().info('cmd_vel linear: "%s"' % linear_velocity_)
        self.get_logger().info('cmd_vel angular: "%s"' % angular_velocity_)

        forward_hz = 80000 * linear_velocity_ / (9 * math.pi)
        rotation_hz = 400 * angular_velocity_ / math.pi

        self.left_motor_control_.write(str(round(forward_hz - rotation_hz)))
        self.right_motor_control_.write(str(round(forward_hz + rotation_hz)))
        self.left_motor_control_.flush()
        self.right_motor_control_.flush()


def main(args=None):
    rclpy.init(args=args)

    minimal_publisher = MinimalPublisher()

    # Motor enable
    motorenable = open('/dev/rtmotoren0', 'w')
    motorenable.write('1')
    motorenable.close()


    rclpy.spin(minimal_publisher)

    # Destroy the node explicitly
    # (optional - otherwise it will be done automatically
    # when the garbage collector destroys the node object)

    # Motor disable
    motorenable = open('/dev/rtmotoren0', 'w')
    motorenable.write('0')
    motorenable.close()

    minimal_publisher.left_motor_control_.close()
    minimal_publisher.right_motor_control_.close()
    minimal_publisher.destroy_node()
    rclpy.shutdown()


if __name__ == '__main__':
    main()
cmd_velに与えるlinear.xで前後方向速度を,angular.zで旋回速度を指令します。
ROS2でのPythonノード作成方法は割愛します。以下コマンドでテスト用のROS2ノードが起動できるようにしておきます。
$ ros2 run myraspimouse myraspimouse
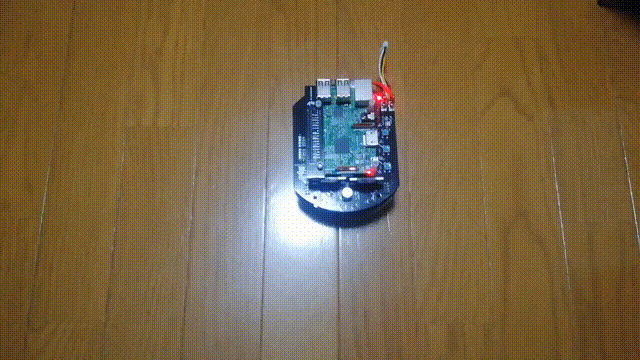
テスト走行
キーボードで操作できるようにteleop-twist-keyboardをインストールして起動します。
$ sudo apt install ros-foxy-teleop-twist-keyboard
$ source /opt/ros/foxy/setup.bash
$ ros2 run teleop_twist_keyboard teleop_twist_keyboard
キー操作とRaspberry Pi Mouseの動作の対応は以下のようになります。
| キー | 動作 |
|---|---|
| i | 前進 |
| , | 後進 |
| j | その場左旋回 |
| l | その場右旋回 |
| u | 左前方に進む |
| o | 右前方に進む |
| m | 左後方に進む |
| . | 右後方に進む |