Raspberry Pi 4 + Ubuntu 20.04で複数のUARTを有効にする
UART configurationによるとRaspberry Pi 4では6つのUARTが利用できるはずですが,Ubuntu 20.04からは1つのUARTしか見えません。しかもデフォルトではシリアルコンソールに割り当てられているので,これを使って通信するアプリケーション(例えばルンバを動かすとか)を作るのはやめた方がよさそうです。
環境
- Raspberry Pi 4 8GB
- Ubuntu 20.04
設定ファイルの編集
以下2つのファイルを編集して,まずはUART0(8, 10pin) 以外のUARTを有効にしてみます。
syscfg.txtで有効にするUARTの数を決めて,usercfg.txtでdtoverlayを読み込ませます。
/boot/firmware/syscfg.txtの編集
以下のように``enable_uart‘‘を2に修正します。
# This file is intended to be modified by the pibootctl utility. User
# configuration changes should be placed in "usercfg.txt". Please refer to the
# README file for a description of the various configuration files on the boot
# partition.

enable_uart=2
dtparam=audio=on
dtparam=i2c_arm=on
dtparam=spi=on
cmdline=cmdline.txt
/boot/firmare/usercfg.txtの編集
dtoverlay=uart2 を追加します。
# Place "config.txt" changes (dtparam, dtoverlay, disable_overscan, etc.) in
# this file. Please refer to the README file for a description of the various
# configuration files on the boot partition.

dtoverlay=uart2
UARTが有効になったことの確認
syscfg.txt,usercfg.txtを編集して再起動すると/dev/ttyAMA1が見えるようになります。
ubuntu@ubuntu:~$ dmesg | grep ttyAMA
[    1.654046] fe201000.serial: ttyAMA0 at MMIO 0xfe201000 (irq = 14, base_baud = 0) is a PL011 rev2
[    1.654434] fe201400.serial: ttyAMA1 at MMIO 0xfe201400 (irq = 14, base_baud = 0) is a PL011 rev2
screen コマンドで/dev/ttyAMA1を開いて,通信できることを確認しましょう。
pin27がTx,pin28がRxです。
$ screen /dev/ttyAMA1 9600
screenから抜ける方法はいつも忘れますが,Ctrl + a, kです。
ほかのUARTも有効にする
syscfg.txt,usercfg.txtを以下のように設定すればほかのUARTも使えるようになります。
ubuntu@ubuntu:~$ cat /boot/firmware/syscfg.txt
# This file is intended to be modified by the pibootctl utility. User
# configuration changes should be placed in "usercfg.txt". Please refer to the
# README file for a description of the various configuration files on the boot
# partition.

enable_uart=6
dtparam=audio=on
dtparam=i2c_arm=on
dtparam=spi=on
cmdline=cmdline.txt
ubuntu@ubuntu:~$ cat /boot/firmware/usercfg.txt
# Place "config.txt" changes (dtparam, dtoverlay, disable_overscan, etc.) in
# this file. Please refer to the README file for a description of the various
# configuration files on the boot partition.

dtoverlay=uart2
dtoverlay=uart3
dtoverlay=uart4
dtoverlay=uart5
ubuntu@ubuntu:~$ dmesg | grep ttyAMA
[    1.662514] fe201000.serial: ttyAMA0 at MMIO 0xfe201000 (irq = 14, base_baud = 0) is a PL011 rev2
[    1.662963] fe201400.serial: ttyAMA1 at MMIO 0xfe201400 (irq = 14, base_baud = 0) is a PL011 rev2
[    1.663212] fe201600.serial: ttyAMA2 at MMIO 0xfe201600 (irq = 14, base_baud = 0) is a PL011 rev2
[    1.663448] fe201800.serial: ttyAMA3 at MMIO 0xfe201800 (irq = 14, base_baud = 0) is a PL011 rev2
[    1.663675] fe201a00.serial: ttyAMA4 at MMIO 0xfe201a00 (irq = 14, base_baud = 0) is a PL011 rev2
ピンアサインは以下の通りです。
| UART | Tx pin | Rx pin |
|---|---|---|
| /dev/ttyS0 | 8 | 10 |
| /dev/ttyAMA0 | 8 | 10 |
| /dev/ttyAMA1 | 27 | 28 |
| /dev/ttyAMA2 | 7 | 29 |
| /dev/ttyAMA3 | 24 | 21 |
| /dev/ttyAMA4 | 32 | 33 |
ttyAMA1で使われる27pinはReservedになっており,起動時には何かデータが出力されるようです。起動時に予期しないデータが出力されると困る場合はほかのUARTを使えばよさそうです。
ttyAMA4でしか確認していませんが,ttyAMA1以外であれば起動時にデータは出力されないはずです。
Application InspectorをDockerで動かす
米Microsoft、ソースコード解析ツール「Application Inspector」を公開とのニュースを見つけたのでApplication InspectorをDockerで動かしてみました。
Alpineをベースにしましたがmcr.microsoft.com/dotnet/core/sdkをベースにしてもイメージのサイズは同じだったのでどちらでもよいと思います。
自分で.NET Core SDKを入れたほうが勉強にはなるかも・・・
環境
以下の環境を使用しました。
- ubuntu 18.04 LTS
- kernel 5.3.0-40-generic
- Docker version 18.09.7, build 2d0083d
Dockerfileの作成
を見ながら
以下のようなDockerfileを作成します。
2つのバージョン間でdiffをとったりできるようなので,ソースをマウントするディレクトリはsrc1とsrc2の2つを作りました。結果は/outputに出力させるようにします。
# docker build --rm -t appinspector:latest .
FROM alpine

# .NET Coreのインストール
RUN apk add --no-cache libstdc++ libintl && \
    mkdir /dotnet && \
    wget https://download.visualstudio.microsoft.com/download/pr/f686a328-a7e2-403c-9107-2e8d8b54aaa9/a1ed4732a9388c5817f79564e3fbbc3a/dotnet-sdk-3.1.102-linux-musl-x64.tar.gz && \
    tar zxf dotnet-sdk-3.1.102-linux-musl-x64.tar.gz -C /dotnet && \
    rm -f dotnet-sdk-3.1.102-linux-musl-x64.tar.gz

ENV DOTNET_ROOT=/dotnet
ENV PATH=$PATH:/dotnet

# Application Inspectorのインストール
WORKDIR /appinspector
RUN apk add --no-cache git icu-libs && \
    git clone https://github.com/microsoft/ApplicationInspector.git && \
    cd ApplicationInspector && \
    dotnet publish && \
    cp -r /appinspector/ApplicationInspector/AppInspector/bin/Debug/netcoreapp3.0/publish /appinspector/publish && \
    rm -fr /appinspector/ApplicationInspector && \
    mkdir /src1 /src2 /output
Dockerfileを作成したらイメージをビルドします。
$ docker build --rm -t appinspector:latest
使用方法
ApplicationInspectorでApplicationInspectorを解析してみます。
$ git clone https://github.com/microsoft/ApplicationInspector.git
$ cd ApplicationInspector
$ docker run --rm -it -v $(pwd):/src1 -v /home/username:/output appinspector:latest
コンテナが起動したら以下を実行します。
# dotnet publish/ApplicationInspector.dll analyze -s /src1
# cp -r publish/html /output
# cp publish/output.html /output
結果の表示
出力結果のoutput.htmlをブラウザで開くと以下のような画面が表示されます。

下部の青いViewReportボタンをクリックすると以下のような画面が表示され,ファイル構成などがわかります。

上部のFeaturesをクリックすると以下のように検出された項目がカテゴリごとに表示されます。

がめんがきれいでいいとおもいます(小並感
Neo4JをNode.jsから使う
Neo4JをDockerでお手軽に試してみました。
実用的なアプリケーションを作るとなるとPythonやらJavascript(Node.js)などから使えるようにしたいです。
公式ドキュメントのDriver Manualを見ながら,Node.jsでNeo4Jにアクセスしてみます。
環境
以下の環境で試しました。
- Windows 10 Professional version 1903
- Node.js 12.10.0
インストール
Driver ManualのGet Startedに .NET,Java,Javascript用ドライバ(Neo4Jアクセス用ライブラリ)のインストール方法が記載されています。
今回はJavascriptを使うので,1.2. Driver versions and installationの中のExample 1.1. Acquire the driverのタブをJavascriptにすると書いてある内容を実行していきます。
以下のコマンドを実行してインストール可能なneo4j-driverの一覧を表示します。
> npm show neo4j-driver@* version
4.0.0をインストールすることにします。
> npm install neo4j-driver@4.0.0
サンプルコードの作成
Get Startedに載っているサンプルは残念ながら動きませんでした。
以下のようなソースをindex.jsとして作成します。
neo4j = require('neo4j-driver');

const uri = 'bolt://localhost';
const user = 'neo4j';
const password = 'neo4j';

const driver = neo4j.driver(uri, neo4j.auth.basic(user, password));
const session = driver.session();

session
.run(
    'CREATE (a:Greeting) SET a.message = $message RETURN a.message + ", from node " + id(a)',
       { message: 'hello, world' }
)
.then(result => {
    session.close();
    const singleRecord = result.records[0];
    const greeting = singleRecord.get(0);

    console.log(greeting);
})
.catch(error =>{
    session.close();
    throw error;
});
以下のコマンドで実行します。
node index.js
Neo4Jへの書き込みに成功すると以下のようなレスポンスが表示されます。
hello, world, from node 343
結果の確認
http://localhost:7474にアクセスして以下コマンドを実行します。 Neo4JのWebインターフェース,コマンド入力部で改行するにはShift + Enterを入力します。
MATCH (a:Greeting)
RETURN a
以下のようにノードが表示されます。ここではindex.jsを2回実行してしまったので2つ表示されています。

WHERE句を使えば指定したidのノードだけ表示させることができます。
MATCH (a:Greeting)
WHERE id(a) = 343
RETURN a

Docker for WindowsでNeo4Jを動かす
グラフデータベースNeo4JをDockerで動かしてみました。 SQLなどの一般的にイメージされるデータベースと異なり,グラフ構造のデータを格納することができるデータベースです。ノードとノードのつながりを表現することができるので,要求と仕様を対応させられるツールが作れそうだな~なんて夢が広がります。
環境
以下の環境を使いました。
- Windows 10 Professional version 1903
- Docker CE 19.03
Client: Docker Engine - Community
 Version:           19.03.5
 API version:       1.40
 Go version:        go1.12.12
 Git commit:        633a0ea
 Built:             Wed Nov 13 07:22:37 2019
 OS/Arch:           windows/amd64
 Experimental:      false

Server: Docker Engine - Community
 Engine:
  Version:          19.03.5
  API version:      1.40 (minimum version 1.12)
  Go version:       go1.12.12
  Git commit:       633a0ea
  Built:            Wed Nov 13 07:29:19 2019
  OS/Arch:          linux/amd64
  Experimental:     false
 containerd:
  Version:          v1.2.10
  GitCommit:        b34a5c8af56e510852c35414db4c1f4fa6172339
 runc:
  Version:          1.0.0-rc8+dev
  GitCommit:        3e425f80a8c931f88e6d94a8c831b9d5aa481657
 docker-init:
  Version:          0.18.0
  GitCommit:        fec3683
- Neo4j:4.0
インストール
コマンドプロンプトまたはPowershellで以下のコマンドを実行してNeo4JのDockerイメージを取得しておきます。
> docker image pull neo4j:4.0
コンテナの起動
以下のコマンドでコンテナを起動します。コマンドを実行するディレクトリがコンテナの/dataにマウントされます。
コマンドプロンプトの場合
> docker run -p 7474:7474 -p 7687:7687 -v "$pwd:/data" neo4j:4.0
Powershellの場合
> docker run -p 7474:7474 -p 7687:7687 -v "$(Get-Location):/data" neo4j:4.0
コンテナが起動すると以下のようなメッセージが表示されます。
Directories in use:
  home:         /var/lib/neo4j
  config:       /var/lib/neo4j/conf
  logs:         /logs
  plugins:      /var/lib/neo4j/plugins
  import:       /var/lib/neo4j/import
  data:         /var/lib/neo4j/data
  certificates: /var/lib/neo4j/certificates
  run:          /var/lib/neo4j/run
Starting Neo4j.
2020-02-13 04:39:51.067+0000 INFO  ======== Neo4j 4.0.0 ========
2020-02-13 04:39:51.077+0000 INFO  Starting...
Webインターフェースへのアクセス
http://localhost:7474へアクセスすると以下のような画面が表示されます。

以下を入力してConnectをクリックします。
- Connect URL: bold://localhost:7687
- Authentication type: Username / Password
- Username: neo4j
- Password: neo4j

ログインに成功すると以下のようなページが表示されます。

サンプルデータベースの作成
サンプルの映画データベースを作成してみます。
Webインターフェース上部のコマンド入力部分に:play movie graphを入力し,右側の▷をクリックします。

下部にある>をクリックして2ページ目に移動するとcypherスクリプトが表示されます。枠の中をクリックします。

上部のコマンド入力部分に空くrぷ都がコピーされるので,右側の▷をクリックします。

以下のようにグラフが表示されます。

データの取得
キアヌリーヴスの出演映画を取得してみましょう。
以下のコマンドをコマンド入力部に入れ,右側の▷をクリックします。
コマンド入力部ではShift + Enterで改行できます。
MATCH (actor:Person)-[r:ACTED_IN]->(movie)
WHERE actor.name = "Keanu Reeves"
RETURN actor,movie
実行すると以下のようなグラフが表示されます。
(ジョンウィックがない・・)

表示形式はグラフのほかにもレスポンスのテキスト形式などに切り替えることができます。

まとめ
Neo4JをDocker for Windowsで起動し,チュートリアルを実行できました。
グラフデータベース,何かにつかえそうですね,なにかに。
ROS2 Pub/Subサンプル
ROSやROS2ではPub/Sub方式で他のノードと通信することができます。
PublisherノードとSubscriberノードを作成して,Pub/Sub通信をしてみます。
プロジェクトの作成
ROS2開発環境のDockerコンテナを起動します。
Dockerイメージの作成方法,使用方法は以下の記事にまとめています。
コンテナを起動したら以下のコマンドを実行し,pubsubプロジェクトを作成していきます。
$ source /opt/ros/dashing/setup.bash
$ cd /home
$ mkdir src
$ cd src
$ ros2 pkg create --build-type ament_cmake pubsub --dependencies rclcpp
作成されたpubsubディレクトリ内のsrc ディレクトリに移動し,publisher.cppとsubscriber.cppを作成していきます。
ソースの記述
publisher.cppの作成
以下の内容でpublisher.cppを作成します。
#include <memory>
#include <chrono>
#include "rclcpp/rclcpp.hpp"
#include "std_msgs/msg/string.hpp"

using namespace std::chrono_literals;

class Publisher : public rclcpp::Node
{
    public:
    Publisher() : Node("publisher_node")
    {
        timer_ = create_wall_timer(1s, std::bind(&Publisher::timer_callback, this));
        publisher_ = this->create_publisher<std_msgs::msg::String>("topic", 10);

    }

    private:
    void timer_callback()
    {
        auto message = std_msgs::msg::String();
        message.data = "Hello World";
        RCLCPP_INFO(this->get_logger(), "Publishing: '%s'", message.data.c_str());
        publisher_->publish(message);
    }
    rclcpp::TimerBase::SharedPtr timer_;
    rclcpp::Publisher<std_msgs::msg::String>::SharedPtr publisher_;
};

int main(int argc, char *argv[])
{
    rclcpp::init(argc, argv);
    rclcpp::spin(std::make_shared<Publisher>());
    rclcpp::shutdown();
    return 0;
}
subscriber.cppの作成
以下の内容でsubscriber.cppを作成します。
#include <memory>
#include "rclcpp/rclcpp.hpp"
#include "std_msgs/msg/string.hpp"

using std::placeholders::_1;

class Subscriber : public rclcpp::Node
{
    public:
    Subscriber() : Node("subscriber_node")
    {
        subscriber_ = this->create_subscription<std_msgs::msg::String>("topic", 10, std::bind(&Subscriber::topic_callback, this, _1));
    }

    private:
    void topic_callback(const std_msgs::msg::String::SharedPtr msg) const
    {
        RCLCPP_INFO(this->get_logger(), "Subscribing: '%s'", msg->data.c_str());
    }
    rclcpp::Subscription<std_msgs::msg::String>::SharedPtr subscriber_;
};


int main(int argc, char *argv[])
{
    rclcpp::init(argc, argv);
    rclcpp::spin(std::make_shared<Subscriber>());
    rclcpp::shutdown();
    return 0;
}
CMakeLists.txtの編集
ros2 pkg createコマンドで自動生成されたCMakeLists.txtを編集し,以下のような内容にします。
cmake_minimum_required(VERSION 3.5)
project(pubsub)

# Default to C99
if(NOT CMAKE_C_STANDARD)
  set(CMAKE_C_STANDARD 99)
endif()

# Default to C++14
if(NOT CMAKE_CXX_STANDARD)
  set(CMAKE_CXX_STANDARD 14)
endif()

if(CMAKE_COMPILER_IS_GNUCXX OR CMAKE_CXX_COMPILER_ID MATCHES "Clang")
  add_compile_options(-Wall -Wextra -Wpedantic)
endif()

# find dependencies
find_package(ament_cmake REQUIRED)
find_package(rclcpp REQUIRED)
find_package(std_msgs REQUIRED)

add_executable(publisher src/publisher.cpp)
ament_target_dependencies(publisher rclcpp std_msgs)
install(TARGETS
publisher
DESTINATION lib/${PROJECT_NAME}
)

add_executable(subscriber src/subscriber.cpp)
ament_target_dependencies(subscriber rclcpp std_msgs)
install(TARGETS
subscriber
DESTINATION lib/${PROJECT_NAME}
)

if(BUILD_TESTING)
  find_package(ament_lint_auto REQUIRED)
  # the following line skips the linter which checks for copyrights
  # uncomment the line when a copyright and license is not present in all source files
  #set(ament_cmake_copyright_FOUND TRUE)
  # the following line skips cpplint (only works in a git repo)
  # uncomment the line when this package is not in a git repo
  #set(ament_cmake_cpplint_FOUND TRUE)
  ament_lint_auto_find_test_dependencies()
endif()

ament_package()
ビルド
上記の3ファイルを編集したら以下のコマンドを実行してビルドします。
$ cd /home
$ colcon build
動作確認
Publisherの起動
ROS2開発環境のDockerコンテナ内で以下のコマンドを実行し,Publisherを起動します。
$ cd /home/src
$ source install/setup.bash
$ ros2 run pubsub publisher
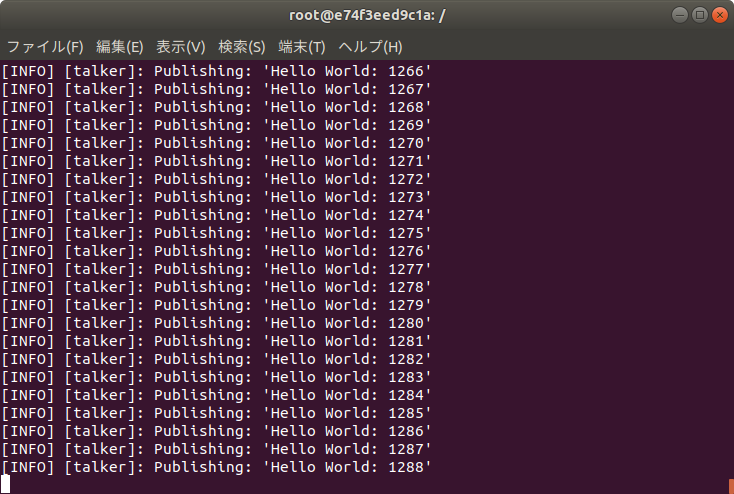
以下のように1秒毎に文字列がPublishされます。

Subscriberの起動
ROS2開発環境のDockerコンテナをもう一つ起動し,以下のコマンドを実行してSubscriberを起動します。
$ source /opt/ros/dashing/setup.bash
$ cd /home/src
$ source install/setup.bash
$ ros2 run pubsub publisher
以下のようにSubscribeした文字列を表示します。
publisher.cppとsubscriber.cppで同じトピックを指定しているので上記で起動したPublisherが出力した文字がSubscriberに表示されます。

Docker環境でROS2プログラム開発
前回作成したROS2開発環境のDockerイメージを使ってROS2プログラムを作っていきます。
以下のような流れです。
- パッケージの作成
- ソースの記述
- CMakeLists.txtの編集
- package.xmlの編集
- ビルド
- 動作確認
コンテナの起動
以下のようにして/etc/groupと/etc/passwdをマウントし,Dockerコンテナのシェルを一般ユーザーで起動するようにするとソースの記述やCMakeLists.txtを編集するときにsudoを使う手間がなくなります。
以降の手順ではros2 pkg createによってディレクトリやファイルが自動生成されるので,空のディレクトリ内で以下を実行します。
$ docker run --rm -it -v `pwd`:/home -v /etc/group:/etc/group:ro -v /etc/passwd:/etc/passwd:ro -u $(id -u $USER):$(id -g $USER) ros2:dashing
コンテナ起動後に以下を実行します。
$ source /opt/ros2/dashing/setup.bash
パッケージの作成
パッケージはsrcディレクトリ内に作成する必要があります。まずはsrcディレクトリを作成し,その中でros2 pkg createコマンドを実行します。
ビルド時にはここで作成したsrcディレクトリの一つ上(ここでは/home)でcolcon buildコマンドを実行する必要があります。
$ cd /home
$ mkdir src
$ cd src
$ ros2 pkg create --build-type ament_cmake sample --dependencies rclcpp
sample/src内にsample.cppを作成
上のようなros2 pkg createコマンドを実行するとsampleディレクトリが作成され,その中にsrcディレクトリが作成されます。
以下のようなsample.cppをsrcディレクトリ内に作成します。
#include <memory>
#include <chrono>
#include "rclcpp/rclcpp.hpp"

using namespace std::chrono_literals;

class SampleClass : public rclcpp::Node
{
    public:
    SampleClass() : Node("sample_node")
    {
        timer_ = create_wall_timer(1s, std::bind(&SampleClass::timer_callback, this));
    }
    private:
    void timer_callback()
    {
        RCLCPP_INFO(this->get_logger(), "Hello World");
    }
    rclcpp::TimerBase::SharedPtr timer_;
};

int main(int argc, char *argv[])
{
    rclcpp::init(argc, argv);
    rclcpp::spin(std::make_shared<SampleClass>());
    rclcpp::shutdown();
    return 0;
}
CMakeLists.txtの編集
CMakeLists.txtを以下のように編集します。
Dockerコンテナを立ち上げたディレクトリ内にあるファイルを適当なエディタで編集すればDockerコンテナ内にも反映されます(当たり前ですが)
cmake_minimum_required(VERSION 3.5)
project(sample)

# Default to C99
if(NOT CMAKE_C_STANDARD)
  set(CMAKE_C_STANDARD 99)
endif()

# Default to C++14
if(NOT CMAKE_CXX_STANDARD)
  set(CMAKE_CXX_STANDARD 14)
endif()

if(CMAKE_COMPILER_IS_GNUCXX OR CMAKE_CXX_COMPILER_ID MATCHES "Clang")
  add_compile_options(-Wall -Wextra -Wpedantic)
endif()

# find dependencies
find_package(ament_cmake REQUIRED)
find_package(rclcpp REQUIRED)

add_executable(sample_package src/sample.cpp)
ament_target_dependencies(sample_package rclcpp)
install(TARGETS
sample_package
DESTINATION lib/${PROJECT_NAME}
)

if(BUILD_TESTING)
  find_package(ament_lint_auto REQUIRED)
  # the following line skips the linter which checks for copyrights
  # uncomment the line when a copyright and license is not present in all source files
  #set(ament_cmake_copyright_FOUND TRUE)
  # the following line skips cpplint (only works in a git repo)
  # uncomment the line when this package is not in a git repo
  #set(ament_cmake_cpplint_FOUND TRUE)
  ament_lint_auto_find_test_dependencies()
endif()

ament_package()
package.xmlの編集
package.xmlを以下のように編集します。
<?xml version="1.0"?>
<?xml-model href="http://download.ros.org/schema/package_format3.xsd" schematypens="http://www.w3.org/2001/XMLSchema"?>
<package format="3">
  <name>sample</name>
  <version>0.0.0</version>
  <description>TODO: Package description</description>
  <maintainer email="root@todo.todo">root</maintainer>
  <license>TODO: License declaration</license>

  <buildtool_depend>ament_cmake</buildtool_depend>

  <test_depend>ament_lint_auto</test_depend>
  <test_depend>ament_lint_common</test_depend>

  <build_depend>rclcpp</build_depend>
  <exec_depend>rclcpp</exec_depend>

  <export>
    <build_type>ament_cmake</build_type>
  </export>
</package>
ビルド
ros2 pkg createコマンドを実行したディレクトリの一つ上(ここでは/home)に移動し,colcon buildを実行します。
$ cd /home
$ colcon build
動作確認
ビルドに成功したら以下のコマンドを実行し,動作確認を行います。
$ source install/setup.bash
$ ros2 run sample sample_package
ここでsampleはros2 pkg createコマンド実行時に与えたパッケージ名,sample_packageはCMakeLists.txtで指定したexecutable名です。
これらを変えれば好きな名前にできます。
上記のコマンドを実行すると以下のように1秒毎に文字列が表示されます。
[INFO] [sample_node]: Hello World
[INFO] [sample_node]: Hello World
[INFO] [sample_node]: Hello World
[INFO] [sample_node]: Hello World
開発環境コンテナでROS2プログラムを作成することができました。
VSCodeの拡張機能か何かを使ってラクしたいですね〜
ROS2開発環境をDockerで構築する
ROS2の勉強始めよっかな〜と思い立ったので ROS2ではじめよう 次世代ロボットプログラミングの第2章を参考にROS2環境をDockerで構築してみました。
セットアップ方法を見ていると「ROS1環境があるところにROS2をセットアップすると環境変数とか依存関係で大変なことになる場合があります」というようなことが書いてあり,そのままインストールするとあとで大変になりそうなのでDockerイメージとして構築してみます。
Dockerfileの作成とイメージのビルド
以下のようなDockerfileを作成します。
# docker build -t ros2:dashing .
FROM ubuntu:18.04
ENV DEBIAN_FRONTEND noninteractive

ENV ROS_DISTRO dashing

# ロケールのセットアップ
RUN apt-get update && apt-get install -y locales && \
    dpkg-reconfigure locales && \
    locale-gen ja_JP ja_JP.UTF-8 && \
    update-locale LC_ALL=ja_JP.UTF-8 LANG=ja_JP.UTF-8
ENV LC_ALL   ja_JP.UTF-8
ENV LANG     ja_JP.UTF-8
ENV LANGUAGE ja_JP.UTF-8

# APTソースリストの設定
RUN apt-get update && \
    apt-get install -y curl gnupg2 lsb-release && \
    curl http://repo.ros2.org/repos.key | apt-key add - && \
    sh -c 'echo "deb [arch=amd64,arm64] http://packages.ros.org/ros2/ubuntu \
    `lsb_release -cs` main" > /etc/apt/sources.list.d/ros2-latest.list' && \
    apt-get update

# ROS2パッケージのインストール
RUN export ROS_DISTRO=dashing && \
    apt-get install -y ros-$ROS_DISTRO-desktop \
    python3-colcon-common-extensions python3-rosdep python3-argcomplete && \
    rosdep init && \
    rosdep update

## 環境設定
RUN    echo "source /opt/ros/$ROS_DISTRO/setup.bash" >> ~/.bashrc
Dockerfileを保存したディレクトリの中で以下を実行します。
$ docker build --rm -t ros2:dashing .
30分以上かかるので気長に待ちます。
動作確認
demo_nodes_cppに含まれるTalkerとListenerを使って動作確認してみます。
うまく行けばTalkerで出力された内容がListenerで受信されることを確認できます。
ターミナルを2つ開き,それぞれで以下のコマンドを実行してコンテナを起動します。
$ docker run --rm -it ros2:dashing
Listenerの起動
一方のターミナルで以下のコマンドを実行し,Listenerを起動します。
# ros2 run demo_nodes_cpp listener
Talkerの起動
もう一方のターミナルで以下のコマンドを実行し,Talkerを起動します。
# ros2 run demo_nodes_cpp talker
表示例
Talkerの表示例
Listenerの表示例

以上のようにTalkerの内容がListenerに反映されれば正常に動作しています。
あとは以下のような感じでROS2ノードを作って遊びましょう。